To Load a Spatial Location File
- Select Tools > Load SLF.
-
When the wizard opens, click Next.

-
When the Choose Spatial Location File page opens, click the folder icon to browse for a spatial location file whose geometries will be created in ProjectWise. By default you are prompted to look in the current datasource, however, if the file exists somewhere on your local file system, click Cancel when the Select Spatial Location File to Import page opens. Once you select your file, click Next.

-
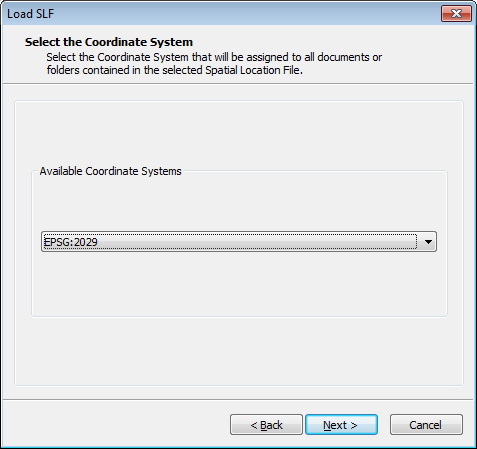
When the Select the Coordinate System page opens, select from the list the coordinate system to assign to all spatial locations, then click Next.
The Spatial Location File does not provide any information about the coordinate system of the CAD file from which the Spatial Location File was generated, it only lists geometries. A spatial location is composed of a polygon and a coordinate system (see also Spatial Locations). The Select the Coordinate System page is used to choose the coordinate system that will be assigned to all documents or folders contained in the selected Spatial Location File.
-
When the Select the Target Folder page opens, select the folder in ProjectWise where the documents/folders can be found whose geometries are listed in the Spatial Location File. After you select a folder, turn on Include Subfolders if any subfolders of the selected folder also contain documents/folders whose geometries are listed in the Spatial Location File. When finished, click Next.

-
When the Import Options page opens, select the required import mode and click Next.
Replace All Spatial Locations — Use this option to replace all spatial locations for all objects which have been found in the target folder, whether these objects initially had a spatial location or not.
Do Not Overwrite Existing Spatial Locations — Use this option to assign the spatial location to an object found in the target folder only if the object does not already have a spatial location.
Prompt Before Replacing Existing Spatial Location — With this option, the user is prompted to overwrite an object’s existing spatial location with the spatial location from the Spatial Location File. The user will not be prompted if the object in the target folder does not have an existing spatial location.

- (Optional)
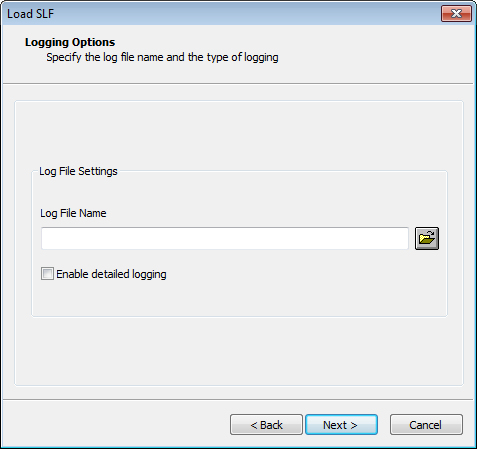
When the Logging Options page opens, enter the name of a logging file to output the import results to, then click Next.
-
When the final page of the wizard opens, click Start Import.
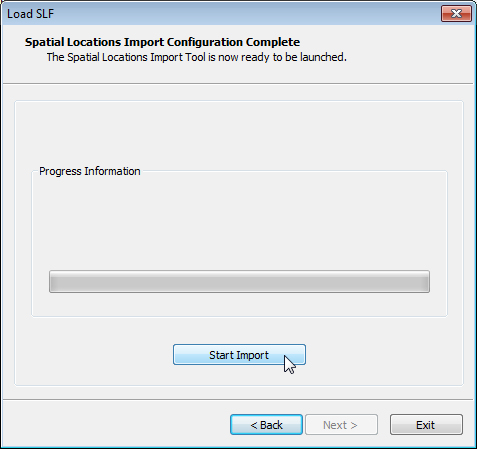
- When the import is done, click Exit.